Tuesday, July 21, 2015

Gather 'Round the Campfire!

Camping week was great fun and filled with tons of imaginative play!  I started by creating a campfire using tree blocks and playsilks and added a s'mores tray for some fine dining.

Here is a closer look at the s'mores.  I used chopsticks, cardboard, brown paper and cotton balls and the kids thought it was amazing!  they had a blast making s'mores all week!!


The highlight of our week, however, was the addition of a giant tent, which was so huge, we had to put some of our toys and furniture INSIDE!
My Pre-K kids created woven checkered picnic blankets with red and white paper.

I wish I'd gotten a photo of the finished product, she drew the most adorable little ants on her picnic blanket!

All the students also created binoculars, which I neglected to take a picture of - actually, I didn't get many pictures all week - but you can see the binoculars being used here as we went on our bear hunt!!


My older kids, who had been camping, took it upon themselves to tell scary stories around our campfire and set up beds and other necessities inside the tent.  Camping week, though lacking in photographic evidence, was a blast!  The kids are STILL asking me for the bear hunt song!


Sunday, July 5, 2015

USA, Hooray!

We had a pretty low-key week here at Seedlings summer camp.  Our theme was 4th of July and at the preschool level, when you ask children about Independence Day, they generally associate it with one singular (and totally awesome) thing...FIREWORKS!  So, we spent our week finding creative ways to make fireworks - and a stellar American flag!

Balloon fireworks are quite possibly one of my favorite projects.  I do it every year.  The children love it, I love it and they always come out gorgeous!

If you are brave and not completely glitter-phobic like I am, go ahead and sprinkle some of the shiny stuff on there after your balloon printing, it'll be great!


Ok, so maybe I'm not COMPLETELY glitter-phobic.  My older kiddos made glue and glitter fireworks this week and I must say, they came out so, so pretty.  I might have to change my mind about glitter...maybe.
I had a special request to finger paint this week, so we used some red, white and blue paints for our pictures.  We've got a theme going on here, ya know!?


My toddlers created some paper plate 4th of July wreaths for the occasion.  When doing this project with the little guys, I suggest using a more inner section of the plate, rather than the slanted outer portion which makes gluing difficult for little hands.


I challenged my Pre-K class with a group project, a giant American flag.  I painted the red, white and blue sections on a large piece of cardboard and then they were tasked with filling in each section with the appropriate colors by cutting apart magazines.


I loved this project.  We practiced cutting, gluing, teamwork, responsibility with classroom tools, conversation, problem-solving, and so much more and we ended up with a truly amazing flag!
Fabulous!!


And no 4th of July week would be complete without Fireworks in a Bag!  For a complete explanation of how to do this project, visit last year's post here.

I will add that using very high quality bags makes a huge difference in the POP!  So get the good bags!

POP!!

Happy 4th of July!


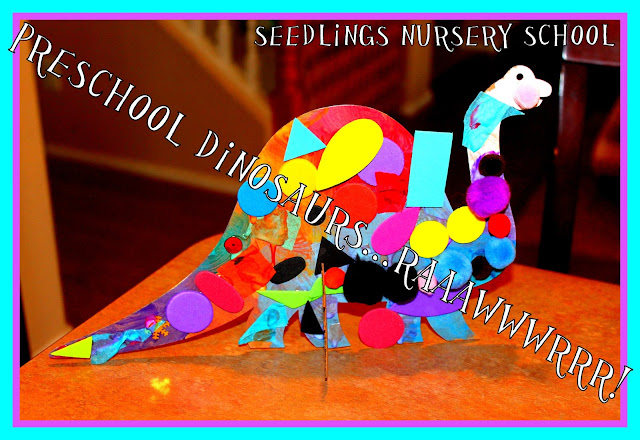
Preschool Dinosaurs.....RAAAWWWRRR!

Who doesn't love dinosaurs??  All the little Seedlings couldn't wait to get their hands on our activities during dino week at summer camp this year!  We had a blast...from the past!! ;)  Take a look!

We started our week with some play dough fossils.  This activity sparked some great discussion and I was surprised, but not really, at the vast dino knowledge the kids already had!  They were teaching ME new facts and pronouncing dino names like true professionals.

This really awesome dinosaur play set is hard to find in the US, but I lucked out and bought it second-hand a few months ago knowing we'd need it for dinosaur week!

The kiddos love the rubbing plates, so we brought them out this week and also used them with our play dough for a fun twist.
Fun textures and a perfect way to demonstrate how fossils are formed!

This 3-D T-Rex puzzle was a challenge, but a few of the older kids were up for it!

These dinosaur collage boards were a must-have!  I love the way they turned out and there are so many possibilities!

My older class had some free-exploration in the art area with paints and mini dinosaur counters.  I loved watching them devise their own way of using the materials.

We had a few options for dinosaur excavation in the classroom.
This cloud dough was popular and loads of fun, but very messy!  Be prepared!
The children were supplied with brushes and safety goggles (optional) and there were bones hidden in the cloud dough to be carefully excavated.  If you want to recreate this activity, be sure to prepare and clean your bones properly.

Our other option for excavation was a kit from Scholastic similar to this one.  Using the enclosed tools, the children carefully scraped away the dirt until each bone was found.
Then we cleaned the 'bones' and assembled our dinosaur!

And because we love cooking around here, we made our own delicious dinosaur bread for snack!
RAAAWWWRRR!

Tuesday, June 23, 2015

Space Adventures in Preschool!

Our week of space adventures was truly out of this world!!!!  We packed so much amazing stuff into this week of summer camp that the kids actually complained on Monday that it wasn't STILL space week!!!

We had some awesome play invitations set up around the classroom.
A set of astronauts and aliens and a beautiful play silk dyed by Kitchen Dye Works.  Buy her stuff, it's gorgeous!!

Our May Whimsy Box, a wonderful new service that brings books to life with interactive elements.  In this case, a dyed play silk, a nebula card, and a constellation disc created by From Jennifer.  I have a lot of her work as well and she and her husband create high quality and lovingly-made products.

I whipped up a few batches of goop after I was inspired by this post from Twodaloo.  I couldn't capture the awesomeness of this stuff very well, but it was a hit with the kids!
Since I ran out of liquid starch and had to use my trusty goop recipe, I decided to rename this masterpiece Galactic Goop!
I used clear glue for the gold batch and it was sooooo fun to use and you get to use big words like 'translucent' when you are playing with it!
We had a blast mixing up all the colors and watching them swirl and blend!
My Pre-K class used mirrors (as suggested in the original idea) and some marbles to create planets and galaxies.
By the end of the week, our Galactic Goop was mostly grayish/purplish, but it was still loads of sensory fun!

And for more sensory fun, we dug our hands into some water beads, with a few marbles thrown in for textural exploration!

The kiddos also got busy with some creative and colorful projects!
We created our own constellations using star stickers and forming pictures and shapes with pencils and crayons.  Some of the older kids even named their constellations!
My Pre-K class, repeated this project using a star-shaped paper punch we received in a Kiwi Crate a couple of years ago.  We also got those handy constellation cards that I laminated so the children could see a few examples of real constellations.

We used liquid watercolors and spray bottles to make beautiful stars!  I recommend getting the spray bottles with the handle and not the ones with the press-down style top, but the kids made it work and this was our final product!

I found these great rocket ship photo frames here and knew they'd be perfect for space week, the kids loved making them especially because painting on something other than a flat piece of paper is something we don't do very often.  After seeing the joy on their faces (and the intense concentration), it is definitely something we'll be doing more often!

These sticker scenes were another online find that I used during our discussion of space and planetary orbits in my Pre-K class.
We also practiced being Earth by rotating around the sun (table) while simultaneously rotating on our axis (spinning until we're silly).  Scientifically accurate portrayal? Probably not, but it resulted in hilarity and laughter, which all add up to a valuable learning experience.

And we finished out the week with some shaving cream marbling.  Since I'm not all about tutorials and such, you can visit The Artful Parent for handy instructions if you'd like to try this at home.  Basically, we drop...
...then swirl...
...press, lift and scrape to create the most amazing planets ever!!

I think we might give Space Adventures TWO weeks next summer!!

 
Related Posts Plugin for WordPress, Blogger...