Showing posts with label egg. Show all posts

Friday, May 24, 2013

Birds All Around Us!

I mentioned in a previous post that we had spent some time building a new, sturdy and comfy enclosure for our chickens, who I introduced in this post.  There have been a few changes since I first posted about the girls.

We originally had two Buff Orpingtons and a Rhode Island Red named Sophia, Dorothy and Blanche, respectively, but Sophia and Dorothy picked on Blanche so much that they removed most of her back feathers and left her bleeding and hiding to get away from them.  We decided to re-home Sophia and Dorothy and do some research about which breeds would be better for us.

After research was completed and Blanche had healed up nicely, we found a few new chickens to join our flock:

 Saffron - an Easter Egger and Pepper - a Barred Rock

 Coriander aka Cori - who I'm fairly sure is a Star Sexlink

all joined good old Blanche, our RI Red, who was being finicky and running about so I couldn't get a good picture.

We moved our coop to the side of our yard, added some tall chicken wire to enclose the area and then went a few steps further with shade cloth and a mister - that my husband picked up on a whim because he's a sweetie and wanted the girls to be cool and comfortable.

After a few anxious days of adjustment, the girls figured out the pecking order and began laying regularly, though it took a couple of them some time to figure out that they should lay the eggs in the nesting boxes and NOT on the ground.

We're getting 2-3 eggs per day, which is perfect as all of these breeds are expected to lay 4-5 times per week.

*********************************************************************************

A few weeks ago, I noticed that there was a mourning dove nesting in the tree just next to our front door.  I was a bit surprised since I always have people coming and going and passing right under her nest, but there she was, happily warming her little egg.


I noticed the egg a few days after seeing the nest and was hoping to get a photo of it when Mama was away, but I waited a bit too long to ask my husband to go out there and get the shot.  When we finally got around to it, this is what he found.


A sweet little baby mourning dove!  We've been watching Mama and haven't gotten another glimpse of baby, but the kiddos know they're up there and we're hoping to meet the little one soon.

We see Mama frequently popping into the back yard to grab some of the chicken feed or the birdseed we keep in our sensory table, so we know she's taking good care of her baby.

*********************************************************************************

So now we have chickens and many bird visitors in the backyard and we have a mourning dove family in the front yard, so when our Kiwi Crate arrived and we opened it to reveal a box full of bird-themed projects, we were beyond excited!!

I'm not a Kiwi Crate spokesperson or anything, I just think they're totally awesome, so I'm going to share this month's crafts with you and if you'd like to get in on the fun, you can click on my link and save $10 and then I'll save $10 and everyone will be saving and also making cool crafts!

Our first craft was making a nest with eggs.  In our crate was everything we needed to make the craft, glue, yarn, cardboard eggs, paint, paintbrush, etc.  My favorite thing about Kiwi Crate - any supplies you don't use for the included projects, you get to keep and use again and again.  In a past crate, we got one of those soft ice cube trays shaped like penguins - can't you just see all the projects you could make with penguin-shaped ice???  I can!!

Ok, back to the eggs and nest.

Put yarn into included paper bowl.
 Empty entire bottle of glue into bowl and stir with included wooden spoon until yarn is all coated.
 Spread glue-covered yarn onto included plastic bowl and spread out into nest shape, leave to dry.
Yes, that's an actual kid-sized plastic bowl that I will now have forever to use for snacks, craft supplies, whatever.  Oh, Kiwi Crate, I love you!
 Moving on, these eggs were great, they came in two parts that fit together, but can be opened and closed as needed - I see an extension craft in our future - baby birds, anyone?
Decorate with included white crayon (if desired).
 And paint with included paint and brush.  Let dry.
 My only complaint here is that the nest is too small to fit both eggs, but the eggs are really the perfect size for little hands, so I'm not complaining much.  And, it's adorable!
 Here's a better shot of the nest portion, which peels right off the plastic bowl when dry.  I've done yarn nests in the past, but this one came out better than any I've ever done.....most likely because it is all one long strand of yarn and a TON of glue - two things I've never done in my previous attempts.

Our next activity was a bird costume.  Monkey decorated a mask with feathers and then got to chose which beak he wanted to wear.  Each beak represents a different bird - I love the variety and creativity!
 He wanted to be a kiwi for a while, then he was a woodpecker and then he decided he didn't want a beak at all.
He also got wings as part of the costume, which I didn't get a picture of, but my little guy thinks they are wonderful!


The Kiwi Crate also comes with loads of information about the monthly theme and this was the first month Monkey was genuinely interested in it.  He wanted to hear everything about the different birds, he asked questions, he wondered, he pretended, he played and he LEARNED.

Children will naturally gravitate towards things that are relevant to their own lives and I couldn't have asked for a better set of circumstances over the past few weeks.

I wonder what next month's adventures will be!!


Wednesday, April 3, 2013

An Eggs-traordinary Eggs-travaganza


Ok, so I took some liberties with the title, but this week of egg dyeing techniques was seriously the most fun I've had in a long time.  The kiddos were all so excited (yes, I know I could have said 'egg-cited') even though Easter was over.  The holiday activities were fresh in their minds and they were more than happy to continue the festivities at preschool.

Because of the way our preschool schedule works, I have different children every day, but a few who come multiple days, and I knew one egg dyeing technique just wouldn't work, so I thought, why not do a different one each day?  Since I have two classes each day, that's quite a few different ways to color an egg!

**********************************************************
Our first adventure was 'Tie Dye Eggs' courtesy of Mom to 2 Posh Lil Divas.  You can find handy instructions on her blog, so I'll just show off our stellar pictures.

Drippity-drop, drippity-drop, make the colors plippity-plop!
 
Squeezing tubes of food coloring is a bit difficult for little hands!
I got the spray bottles at the Dollar Tree - they are the perfect size and only have a 'mist' function, so it's difficult for the little ones to get too carried away when all they want to do is spray, spray, spray! 
We waited patiently until the end of class for our results, but they were worth the wait!!
Awesome!!!  By far our best results!

***********************************************************
Our next technique was natural food dye.  There are a TON of recipes and suggestions online, but I'll just go ahead and link you up with my favorite local blog, Fit Kid's Clubhouse
Based on numerous suggestions, I decided to try the most mentioned items, cabbage, beets, blueberries, coffee, and turmeric.  I also had some curry powder and thought I'd throw that in for good measure.  The most common item I heard mentioned to get a green egg was liquid chlorophyll, but who the heck has that laying around?  I thought I'd try some chlorella powder - cause, ya know, EVERYONE has THAT laying around! :)
There were many sights and smells with this technique, the worst of which was the lovely algae aroma of the chlorella powder.....needless to say the kiddos left the kitchen and headed outside as we boiled everything and awaited results. 
Prior to placing the eggs in the pots, I wrote on them with a white crayon the name of each natural dye we were trying - as you can see, only the coffee egg really held the crayon.  There is faint lettering on the turmeric egg as well, but I'll just have to rely on my memory.  From the top left: chlorella - pretty much no color; coffee - light brown; beets - pinkish/grey; blueberries - blue-grey; turmeric - yellow; curry powder - light yellow; cabbage - light blue; and the last one was a mix of the red cabbage and the turmeric that I threw together at the last minute after seeing it on the Fit Kid's Clubhouse blog - ya know, just in case the chlorella didn't take.

Overall, this was a good experiment for the kids, we got to use our senses and we learned never to boil chlorella powder again!

*****************************************************
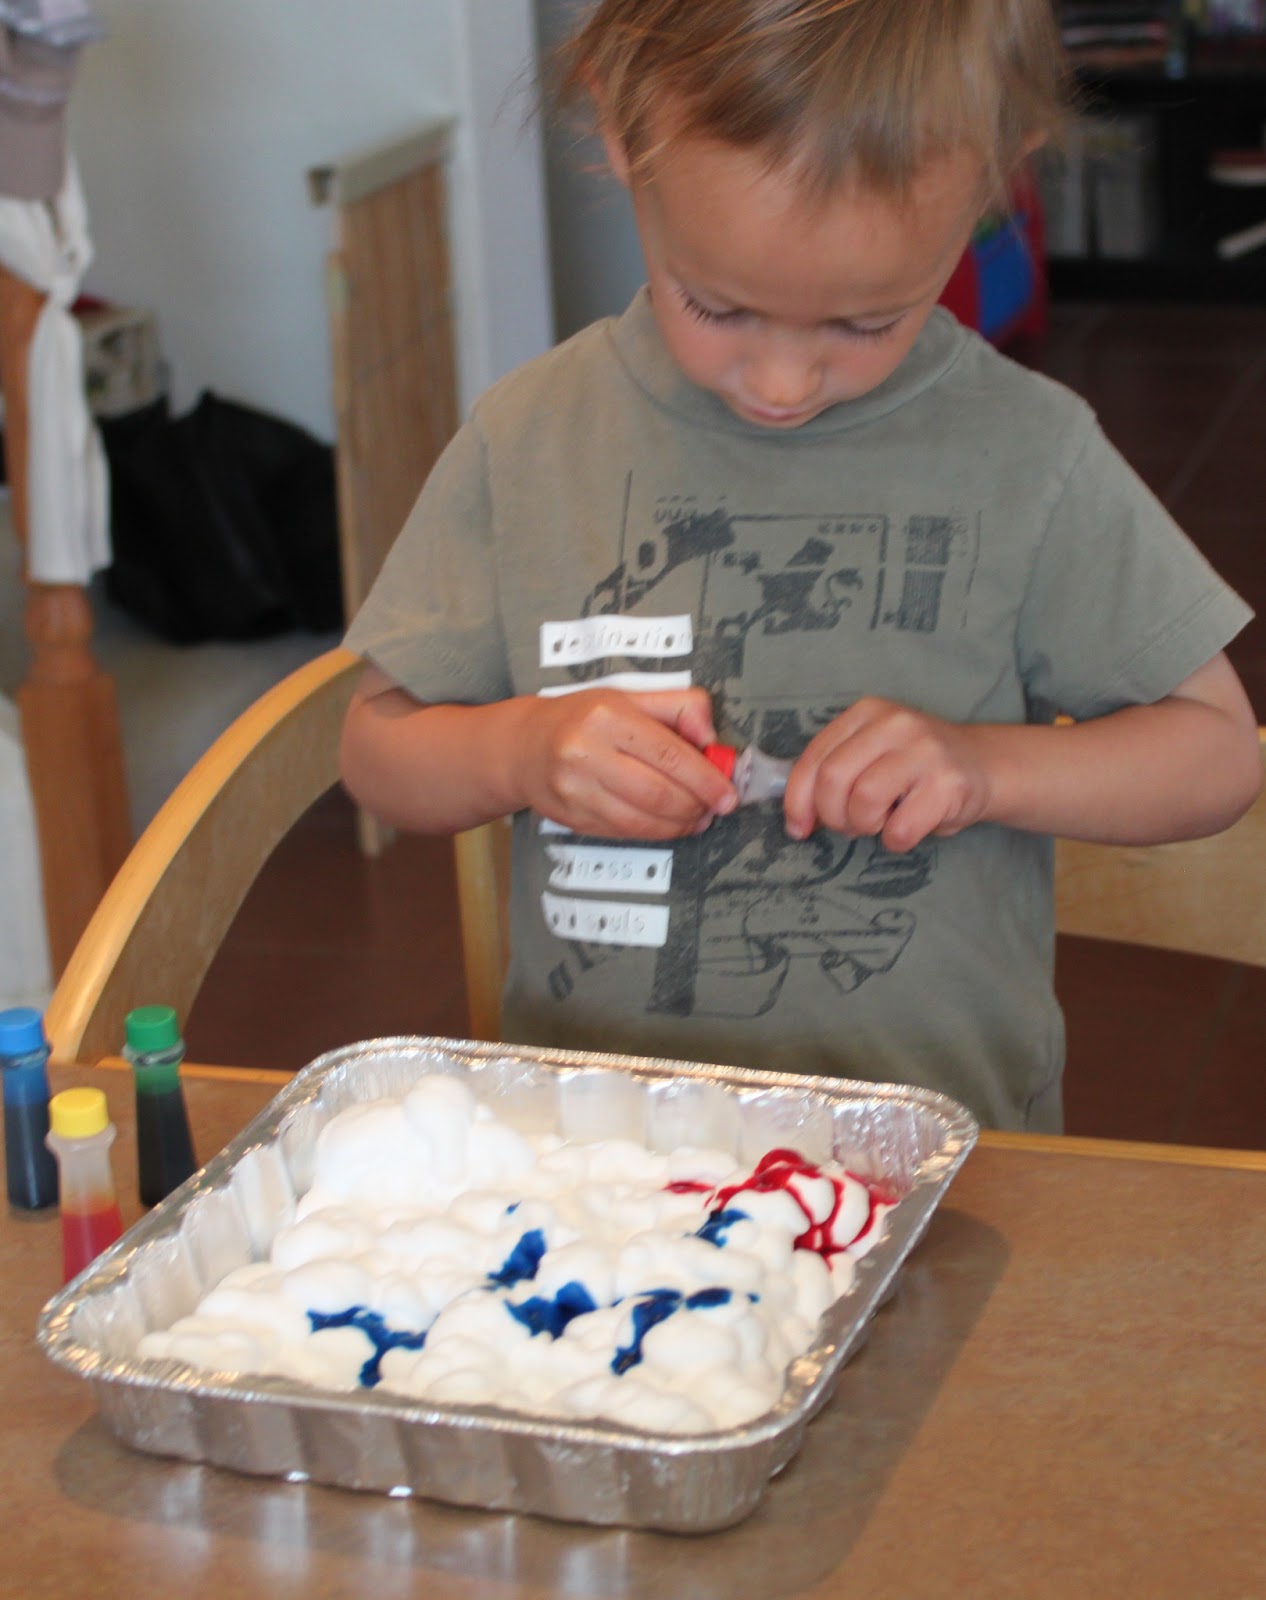
My favorite this week had to be our Shaving Cream Eggs (real and paper).  Done beautifully here.  I've done shaving cream art in the past and it's always a favorite, but after reading about mixed results on the eggs, I was determined to get a beautiful finished product.
I made sure to use just enough shaving cream to cover the bottom of the tray and encouraged the kiddos to use as much color as they wanted, then some swirling and roll the eggs in the cream.  I let them sit for a few minutes before wiping the shaving cream off with a paper towel.
I'm very happy with the way they turned out and the kiddos got to take home the paper versions.

*****************************************************
 Next up: A technique using hot glue as a stencil that I found at Measured by the Heart.  I know most preschool teachers wouldn't allow the use of hot glue guns by the students, but this particular class is made up of all older children and I knew they would use caution.  I loved this technique in theory, but I had some difficulty with it.  I'm not sure if it was the hot glue itself, or the fact that I decided to take a short cut and use the 'hard cooked eggs in the oven' method for this particular dozen eggs, but something went wrong.  As we peeled the glue from the eggs, the shell came with it; thus, not revealing the lovely stenciling featured on the blog.
However, I'm pretty sure that because I took this very cleverly composed shot of our materials, all is forgiven. :)
 We used whisks to make dipping easier after we applied the hot glue and the kiddos had a blast just dipping and dipping and dipping, until we ended up with quite a few brown eggs....they didn't care about the glue portion at all, really.
 Well, putting the glue on was fun, but beyond that, it was all about the dipping!
 I still think the results were lovely!

****************************************************
Last, but definitely not least, our most EGG-splosive (yes, I went there) technique - Volcano Egg Dyeing!!!  We did this one last year and it was a huge hit, so I decided to use it for the final two classes.  
I made a very thick paste with baking soda, food coloring and water for the children to paint on their eggs.  Once they were finished painting, I gave them the 'secret ingredient' - vinegar!!
Once they discovered what happened when the vinegar was poured on the egg, they couldn't get enough!  They painted and poured and there was no stopping them - it was a great way to finish off our egg dyeing adventures!


I know this was a long one, thanks for sticking with it!!  Now, off to plan for next Easter!


Sunday, March 31, 2013

What We're Up to in April


Happy Easter!  Although the holiday is now behind us, I waited until April to roll out our Easter and Spring activities.  March was all about rainbows, shamrocks and other Irish inspirations, and I really wanted Easter to have a full month as well - so here we are, a bit late, with Easter fun.

As Seedlings evolves, I try to work in as many educational philosophies as I can, recently, I've created a 'Montessori-inspired' area in my classroom and while I don't kid myself that I'll ever actually own true Montessori materials, I make my best effort based on activities commonly found in Montessori classrooms.  I roll in some Waldorf, Reggio and the Miss Lindsey special - shake it up - and our shelves are filled with colorful and creative invitations for the children.

This month's writing salt is yellow and scented with lemon essential oil.  It's light and refreshing and gives the children an exciting new way to practice early writing skills.
This tray is a variation on the opening and closing activities of the Montessori method, the children can put the flower gems inside the eggs, count, sort, pattern, shake, you name it!
Sorting and matching are always more fun when you add tongs!!
Pink play dough scented with geranium essential oil gives this 'create an egg' invitation a little something extra for the children to discover as they play.
The sewing basket was added to the classroom just a short while ago and the children loved it immediately.  I've sent quite a few fabric scraps with buttons sewn onto them home to Moms and Dads and I couldn't be more proud of those little hard-working fingers!  I've refreshed the basket, adding new felt scraps, buttons and embroidery floss.
Our Easter/Spring sensory tub is back, this year residing in storage bin on the block table.
Each month, I rotate the materials on our art shelf.  This area is always open for the children to create whenever the mood strikes.  For April, I've added multicolored pom poms, a rainbow of tissue paper squares, sequins, and spring-themed self-stick foam shapes.  I also trace seasonal or theme-related shapes for the children to cut and decorate - this month, I've made egg shapes on sheets of craft foam.

Happy April!!

Related Posts Plugin for WordPress, Blogger...