Showing posts with label outside. Show all posts

Tuesday, May 14, 2013

Mud Day!

I have a problem with change.  Not the 'normal' problem with change, exactly the opposite.  Most people resist change, happy to stay in their cozy, predictable bubbles for as long as possible. 

Not I! 

I love change, especially when it comes to moving things around in my preschool classroom.  Even as a child, I rearranged my bedroom furniture monthly and it was a 10ft x 12ft space with four pieces of large furniture.  Now that I have larger spaces and tons more stuff to work with, things can get a bit wild.

My biggest problem to date has been our outdoor classroom.  Unfortunately, our yard is just a dirt lot with an inconvenient hill at the back wall, which cuts at least 6ft. of potentially usable space right out of our play area.

Ever since we adopted our chickens, we've been mulling over the best way to work their area into our yard.  We've moved the coop a few times, but I finally determined that if we wanted to have a successful garden, the chickens would have to be placed on the opposite side of the yard.  This final move meant that even more of our usable play space would be sacrificed. 

(As a side note, my husband just built the chickens a veritable Club Med - more on that later.)

I decided to use the flat back of the chicken coop as support for our mud kitchen - which is this kitchen that someone donated to my preschool a few years ago.  When I replaced it with a wooden cabinet, I didn't have the heart to get rid of it, so it moved outside and our mud kitchen came to be.

Up until this week, I don't think it's ever truly been a mud kitchen - just a little sand, straw and water, but never REAL squishy, smooshy, cool mud.

Because the kitchen moved, the kitchen table had to move, and it was placed, you guessed it, on the inconvenient hill I mentioned.  Time for a little science lesson:  What happens when you start filling pots and pans with water on a table placed on a hill? 

Puddles!  And puddles = MUD!
I'll be the first to admit that this is not an everyday occurrence, sometimes the kids get a bit too rowdy and it's too chilly to hose them down, sometimes I don't feel like changing 4 or 5 kids and washing clothes and shoes, sometimes the children in attendance aren't that into getting dirty.  For whatever reason, planetary alignment, chemistry between the kiddos, precisely the right amount of coffee for Miss Lindsey, this day was the perfect day for mud!

They were all involved, scooping, pouring, filling, stirring.  There were little explorers elbow deep in the stuff.  Each child assigned himself or herself a job.  No one got in any one's way.  No one stopped to argue about which child was using which cup/spoon/pan.  This was serious work.
I even managed to get a video of the action to share with the Moms and Dads - something like this can't really be summed up in pictorial form alone.

And, ya know, I must admit that clean-up on my part only took a few minutes, certainly not the disaster I had previously envisioned.  I have a feeling mud day may make an appearance more often!


Wednesday, May 8, 2013

Our Week (or 3) of Butterflies!

Just like our ladybug project, I ordered our butterfly larvae from Insect Lore.  I've been doing this project with my students for more years than I can count and I've slowly been increasing the number of butterflies I order.  For a while, I ordered one small cup of caterpillars (about 5 or 6), then last year, I had two classes, AM and PM, so I ordered two cups and we ended up with about 10 painted lady butterflies.  

This year, I have 13 students, not including my own children, but since I can only have 4 students each class period, every day looks different as far as kiddos go.  I wanted each child to experience the best part of the butterfly project - releasing the butterflies - so I ordered a 'school kit' so we'd have enough of the lovely painted ladies to release a few during each class.  

When my kit arrived and I finally got them placed into their individual cups, this is what I ended up with.
That is a grand total of 47 caterpillars....aaannnnddd, maybe I went a bit overboard with the ordering, but never mind that, on to activities.

I've been working hard to incorporate more Reggio-inspired ideas into my curriculum and because long-term projects are something used quite a bit in that particular school of thought, I figured our butterfly project would be a great time to start introducing documentation and observation to the children.

Here are some samples of my son's observations:

And because this observation and documentation thing is still new to me, these are the only three I actually managed to get done, however; you can see the progression of thought and the addition of detail in just this short amount of time.  The first picture doesn't look like much to the casual observer, but I know that the 'S' in the bottom left is his caterpillar; the second picture shows the cup with the concentric circles and the caterpillar to the left; by the third picture, he asked me to label everything for him.  Next time, I'll remember to finish these observations with him - who knows where he would have gone next!

We kept a close eye on our caterpillars over the next week and they eventually got to be quite large.

The next step in the process is the 'J' hang - and now I'm really wishing I'd done more observational drawings with the kiddos - how cool is this?


Finally, all of the caterpillars became chrysalids (which I guess sounds nicer than chrysalises) and I had to painstakingly pin each cup lid to the side of our butterfly garden.  There were a few that had to be placed on the bottom, but I managed to fit all of them in there safe and sound where we watched and waited for another whole week.


While we were waiting, we made some fun crafts.  And of course, no butterfly unit would be complete without:


We made pom-pom caterpillars.


And had a bonus math lesson when we spontaneously decided to count our pom-poms.


We also used wool roving wrapped around a pipe cleaner to create rainbow chrysalids.


And finally, coffee filter butterflies, because children love spray bottles and they always turn out lovely!

Gorgeous!

And finally, after two weeks of waiting, we were visited (on Saturday, of course!) by our very first butterfly.


And soon, we had a butterfly garden literally overflowing with painted ladies.


We have spent this week saying goodbye to our new little friends, some of whom were kind enough to give us an extended goodbye.


Even the littlest Seedling got in on the action!


Next year - praying mantises??  I think so.


Friday, April 26, 2013

A Week of Weather: Wind, Clouds and Rain


Monday, April 15, 2013

10 Preschool Sensory Bin Ideas


 We always have plenty of sensory experiences here at Seedlings, but we love to go beyond the typical sand, water, potting soil, rice, birdseed, beans, etc.  Here are some examples of seasonal and anytime sensory bins.


Spring/Easter Theme: shredded paper, plastic eggs, spring foam shapes, spoons, baskets.

 Cloud dough: 8c. flour, 1c. oil - I used baby oil

Bug Theme: shredded paper, wood blocks, plastic bugs and trees.

Pond Theme: Colored water, river rocks, frog life cycle models, magnifying glasses.

Gardening Theme: sand (or potting soil), garden tools, plastic planters, faux flowers.

Gardening/Flowers/Spring Theme: Lavender scented water, water beads, faux flowers, cups for scooping and pouring.

Christmas: Dyed rice, ornaments, gift boxes.

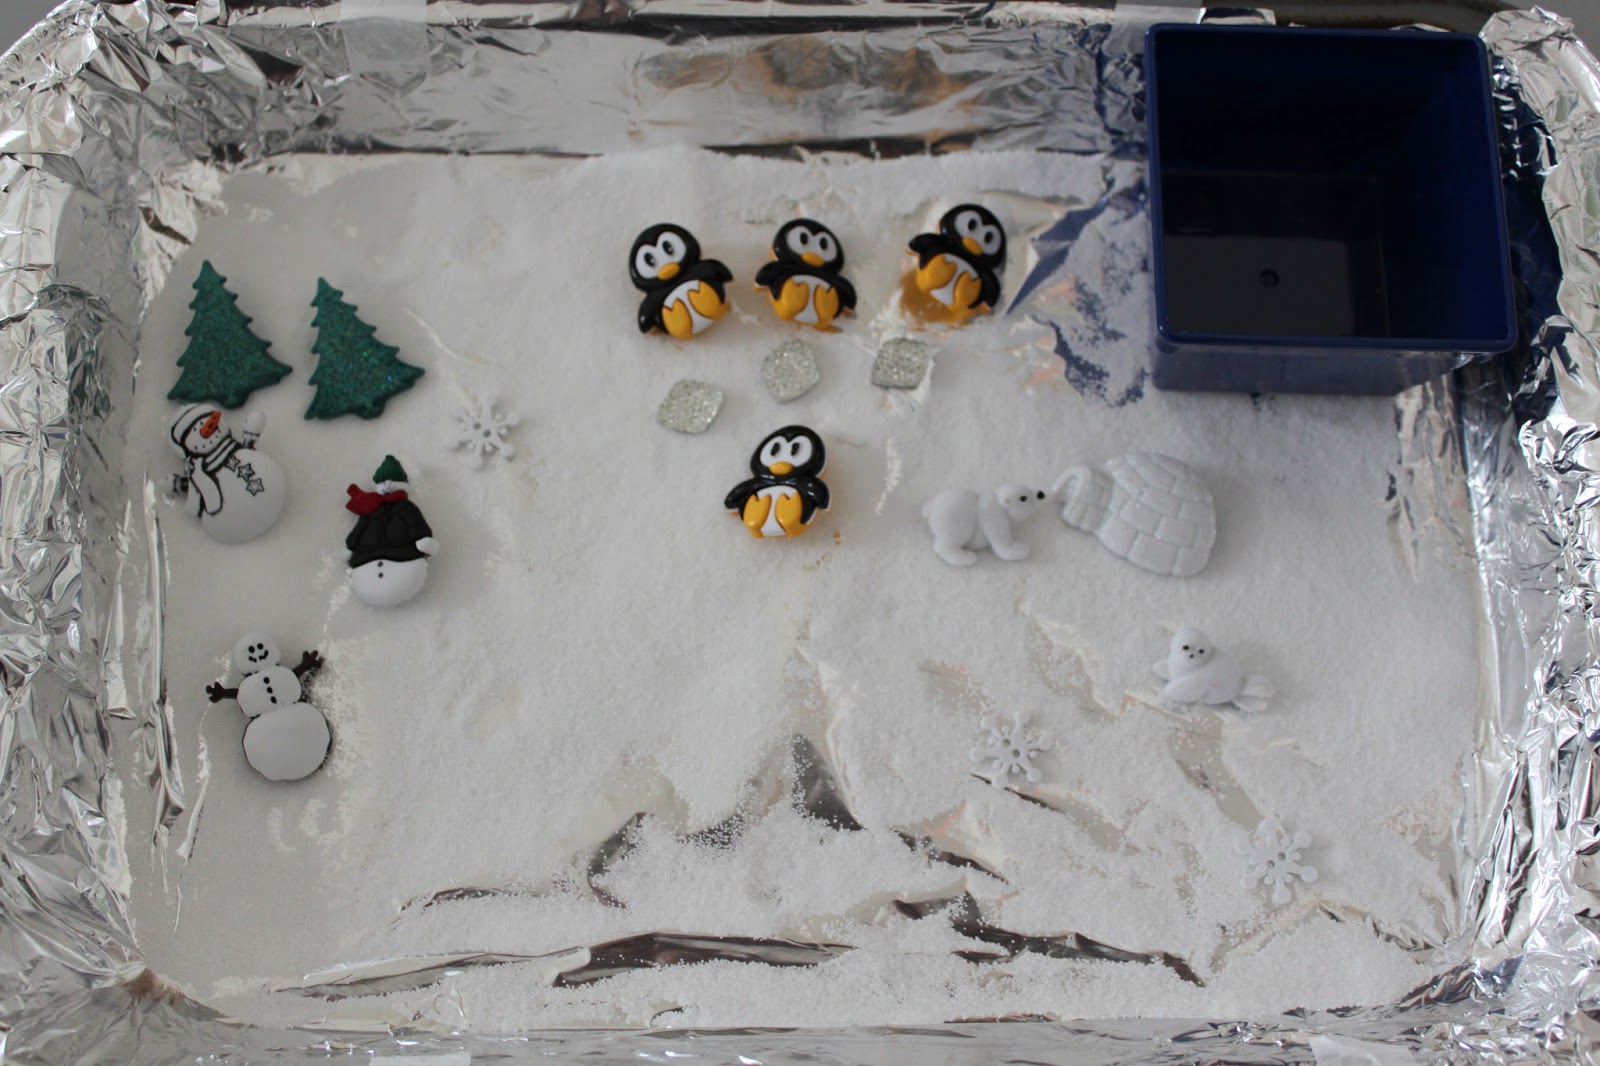
Arctic/Winter Theme: Tray covered with foil, vanilla-scented glitter play dough, Arctic TOOB

Arctic/Winter Theme: Salt in tray covered with foil, small arctic buttons (Hobby Lobby/Michael's) and blue and white pom-poms (not pictured).


Monday, April 8, 2013

Miss Lindsey Had a Farm


And on that farm......well, backyard really, were three little chickens named Blanche, Dorothy and Sophia....do you know where those names came from??  Do tell!!
That's right, we are now the proud owners of two Buff Orpingtons and a Rhode Island Red - that's Blanche, of course!  We decided to begin keeping backyard chickens, mostly for the free eggs and fertilizer, but also because we're a bit too busy (or maybe a tad lazy) to worry about composting and we needed a place for our food scraps.  Thus far, the ladies are quite happy to gobble down whatever it is we give them.  They especially like cabbage, celery and other green stuff, though we give them fruit scraps as well.
I took the pictures on the first day they joined us, so they were getting cozy and relaxing in the coop, I'm sure I'll get some shots of them roaming about the yard at some point.  Speaking of the coop, we purchased ours from Marco with San Tan Valley Coops and More.  We got the most basic coop out there, but this guy builds some serious stuff, so if you are in the market and in the Phoenix area, check him out.
And since we were in a farm-y mood when the chickens arrived, we decided to make some fresh bread and butter for snack the next morning in our preschool class.  Just in case you are feeling farm-y, here are some recipes for you:

Bread

2 1/4 - 2 1/2 c. flour - I do a mix of bread flour and whole wheat
1 c. warm water
1 1/2 t. yeast
2 T softened butter
Handful of rolled oats
2 T honey - or more if you like
1 1/2 t. salt

Ok, so I cheat and put this in my bread machine, according to the directions for dough, pull it out and let the kiddos make it into rolls or any shape they like.  We cover and let it rest for 15min. and then bake at 375 for 12-15 min. or until golden.  BUT, if you want to do it the old fashioned way, you would:

Mix water and honey, top with yeast, let foam
Add oats, butter, flour and salt, mix
Turn out and knead for 10min.
Leave to rise covered in oiled bowl for 1 1/2 - 2 hrs.
Form into rolls/shapes
Cover and let rest 15 min.
Bake 375 for 12-15min.

And you can't have bread without:
Butter!

Whipping cream
Salt


Baby food jars are perfect for little hands, but I'm sure any jar would work.  Place a few tablespoons of cream into the jar (or no more than 1/2 full if using a larger jar) and add a pinch of salt.  Shake, shake, shake!  Oh, and when you are shaking, you should probably look like this.

If you don't, I'm not sure it'll turn out right.  Kidding, of course!  But, seriously, how funny is he??

Anyway, once your butter has formed, you'll have some buttermilk left in the jar, so swish some cold water around in the jar until that excess washes away and the water runs clear.  I've made butter like this many times in the past, but I've never rinsed with water before, I learned about that part from the curriculum guide I purchased from Little Acorn Learning and let me tell you, it made a world of difference - I'll continue making butter this way every time!

Well, if you've been following along, you should have some warm bread and some delicious, creamy butter ready to devour right about now, so go ahead and enjoy!


Friday, March 29, 2013

Our Water Wall - Part 1


I've been wanting to create a water wall for quite some time and it wasn't until my husband said he could bring home some wood scraps from work that I finally had an inexpensive way to get it done.  It's going to be an ongoing project as I collect the materials I need to add more waterways, but I thought I'd document the process just to show how easy it really is.

I used some funnels and tubes I found at the dollar store to make the first set of waterways.  Just a few holes with a drill, some cable ties and voila!
My son wanted to dive in right away, so I had to think quickly about how I was going to collect the water at the bottom.  I grabbed the tub from my sensory table and filled it up to get him started.

He decided it would be easier to get his bathing suit on and just jump right in, so he did.
I had to place some blocks under the tubes, so they would stick out enough for the water to make it into the sensory tub; a problem I hope I can correct by adding some more bottles and containers as well as smaller catch buckets.  
I leaned the whole thing up against our little climber/slide, so the kiddos could pour from the top, but he hasn't discovered that yet.  I'll wait for that exciting day!  Until then, though, he seems satisfied enough with the preliminary results.


Related Posts Plugin for WordPress, Blogger...