Friday, April 12, 2013

Fireflies in a Jar: Black Lights and Water Beads


We did this activity last year, but I've had quite a few folks ask about it, so I thought I'd share, especially since our bug themes are fast approaching.
A lovely friend informed me that if I soaked clear water beads in tonic water, they would glow under black lights.  I happen to have black lights that fit perfectly inside my light table, so I thought I'd try it out last summer for our unit on fireflies.

I let the water beads soak overnight and had the children count 10 for their small baby food jar, then I filled the jar with water, glued the lid and set up the light table.  For my son, we used the light table at night, but for class during the day, I created a 'tent' over the light table with a dark blanket, so the kiddos could watch their 'fireflies' in action.

The water in the jars did eventually get a bit icky, so I had to dispose of our lovely fireflies, but they were amazing while they lasted!


Thursday, April 11, 2013

Screen-Free Week 2012: Confessions of a Wannabe Waldorf Mom

Last year, I wrote a blog post of sorts, that I posted on my Facebook page as a note, and on my website.  I also happened to join in a conversation on the Simplicity Parenting Facebook page and post the link to my blog, which was then recognized by one of the admins on the Simplicity Parenting blog who asked to publish the piece with a few minor edits.  I obliged and that post can be found here.

Screen-free week is fast approaching and I wanted to get things started by reposting last year's blog, not only to open it up to a wider audience, but to remind myself how effective the changes I made were at that time.  Over the next couple of weeks, I'll be talking about my family and our approach to media both for ourselves and our children, but for now, here is the warm-up.


Screen-Free Week: Confessions of a Wannabe Waldorf Mom
May 8, 2012

It’s 11:30am, you’ve just finished up three hours of work and you have an hour in which to feed your 2 ½ yr old son and ‘attempt’ to get him to take a nap (which he stopped doing about 6 months ago) before your next three hour block of work.  Here’s how it goes down: you plop something down in front of him while you go about cleaning up from the morning’s events; checking and replying to email; preparing and eating your own lunch and constantly reminding him that he better eat his lunch (which he is currently ignoring) so he can go take a nap.  With about 30 minutes to spare, you declare that it’s time for a nap and take your little one upstairs completely wired from the morning activities and then get frustrated when he can’t wind down and fall asleep in the 20 minutes you have left to accomplish the task.  Eventually, you give up and finish preparations for the afternoon which is bound to be extremely difficult with an over-tired, under-fed toddler on your hands.

Fast forward a week; same scenario; same 2 ½ yr old; same 1 hr before the hustle and bustle begins again.  On this day, however, you give your child two choices for lunch: he can have a sandwich or some hummus.  He chooses the latter and you oblige.  You tell him that after lunch he can either choose to take a nap in his bed, or have quiet time upstairs in his room.  He chooses quiet time and asks if you’ll join him upstairs for a few minutes.  You agree.  He finishes eating, helps put his food away and starts upstairs on his own.  After a story, a few minutes of dress-up and some marbles down the homemade paper towel tube marble track, you tell him that you have some work to do, but he can choose to have more quiet time in his room or take a nap in his bed.  He asks you to stay, but after a gentle reminder that after lunch we have quiet time, he settles into the rocking chair with a book.  When the hour is up, he happily rejoins you in your daily work and remains agreeable for the remainder of the day.

What happened here, you ask???  Screen-Free Week, that’s what!

Yes, I’ll admit it; that was me up there in that opening paragraph completely unaware (or perhaps blissfully ignorant) that my personal computer usage was causing my child’s unappealing behaviors.  Let me backtrack a bit.

For Christmas 2009, my older brother sent me a copy of Simplicity Parenting by Kim John Payne.  I devoured it and realized that I was on a path with my newborn son that I didn’t want to be on anymore.  We simplified, getting rid of ‘stuff’ in every aspect of our lives from clothes, toys and knick-knacks all the way down to credit cards and debt.  In addition, I very quickly eliminated television from my life and when we moved into a new home, we chose to leave our ‘living room TV’ behind, keeping only one that would reside quietly in my husband’s office for use after our son was in bed.  After a few months without a TV as the focal point in our home, we realized how little we used it and cancelled our cable.  My son hasn’t seen a moment of television since he was about three months old; and I would never, ever compromise on that fact; because, really, a television is a completely useless, time-consuming and energy-sucking device. 

Until now, I refused to say similar things about my computer; always making excuses about needing to get ‘work’ done or waiting to hear back from someone about something or some other nonsense which really didn’t matter.  When my old desktop took a nosedive and my husband’s appeared to be doing the same, he opted for a new laptop to serve as a ‘family computer’.  Unfortunately, the best place to house this new screen was in our kitchen.  For a long while, it was easy to ignore.  We were embracing a more Waldorf-inspired, simple lifestyle and I didn’t want that screen distracting my child from his real work: play.  I managed to get all of my work, communicating, etc. finished after he was in bed and the laptop remained closed the rest of the time.  I even remember getting upset with my husband after we first got the new computer for spending hours on end organizing music files and other odds and ends to get things the way he wanted them.  I even took it upon myself to ask if we could move the laptop from the island in the center of our kitchen to the farthest corner of the kitchen table where you literally sit in a tiny nook to use it.  It went on this way for months.  I’m not sure how the change happened, it was probably a slow process, kind of like the ‘frog in a pot of water’ scenario that Kim John Payne describes in Simplicity Parenting….you have no idea what’s going on around you until you finally look up and realize you’re in boiling water and you’d better get yourself out now!

That was me – the frog.  Wondering why my sweet little boy who always played on his own and was rarely disagreeable was turning into the very definition of a child in the ‘terrible twos’.  Then one day, it hit me; it was me; I was the cause of his inner frustrations.  I was also the target and decided a change was in order.

The Plan: No computer for an entire week and then after Screen-Free Week, no usage until after bedtime, just like the TV.  Reestablish a connection; this means meals together and a predictable daily rhythm.  Reread Simplicity Parenting.

Obviously, from the opening paragraphs, you can see it was a successful endeavor.  There are still a few arguments here and there; like when he wants chocolate for breakfast and I have to remind him that it’s oatmeal day or when he declares that he ‘doesn’t like’ the dinner that he helped prepare even before tasting it and I have to remind him that ‘this is what we cooked, so this is what we have to eat tonight.’  Overall, I’d say, we’re sticking with it!

Of course, there were a few other lessons for the week; such as, when you decide to go screen-free for a week, be sure not to find a baby bird in your sandbox and attempt to know what to do with it.  My husband made fun of me on that one, and I did, in fact, have to utilize the internet to learn that I could feed the bird a paste made from egg yolks.  Does that seem horribly wrong to anyone else??

I’ll never say a computer is a completely useless device, but I will say that when it comes to a choice between my child and anything else; my child will always come first.  He’s going to have a little brother soon and it’s a relief to know that all we have to do is stick with this new rhythm and adjustment should be that much easier.  We’ve simplified our lives so much over the past couple of years and I’m proud to say I feel I have finally taken that last big step toward being able to call myself a wannabe Waldorf Mom.

Wednesday, April 10, 2013

DIY Montessori-Inspired Sound Bottles


I've been perusing the Montessori materials websites lately and finding activities that I can recreate on my own without breaking the bank.  It all started with our sewing basket, which is a classroom favorite.
A few weeks ago, my son asked for 'yogurt smoothies' during our weekly Trader Joe's trip and I happily obliged knowing just what I was going to do once my lil man helped out and drank all those yogurts.
Sound bottles!

Although the sound quality isn't as good in the plastic bottles as it is with the more traditional wooden cylinders, I decided to try it out anyway using whatever was around the house to make my first set of bottles.

I used water, popcorn kernels, dried pinto beans and rice.  I measured 1/4 cup of the items into their assigned bottles because I wanted the bottles to feel the same as the kids were shaking to allow for the sound difference to be the only variable.  Once everything was measured, I hot glued the tops, just in case.
I labeled the bottom of each bottle for the children to check their work.  Even though they aren't reading, they can recognize the individual words as shapes and decipher whether or not the words match.  
My son loved the activity as soon as it was presented and I am allowing him to help out the other children as they discover the new game.  It never ceases to amaze me how quickly children can not only discover a new activity, but also understand its purpose.  On the very first day the bottles were in their new home in the classroom, I heard a little guy shaking away and after a moment or two, a joyous, "That's a match!!"


Monday, April 8, 2013

Miss Lindsey Had a Farm


And on that farm......well, backyard really, were three little chickens named Blanche, Dorothy and Sophia....do you know where those names came from??  Do tell!!
That's right, we are now the proud owners of two Buff Orpingtons and a Rhode Island Red - that's Blanche, of course!  We decided to begin keeping backyard chickens, mostly for the free eggs and fertilizer, but also because we're a bit too busy (or maybe a tad lazy) to worry about composting and we needed a place for our food scraps.  Thus far, the ladies are quite happy to gobble down whatever it is we give them.  They especially like cabbage, celery and other green stuff, though we give them fruit scraps as well.
I took the pictures on the first day they joined us, so they were getting cozy and relaxing in the coop, I'm sure I'll get some shots of them roaming about the yard at some point.  Speaking of the coop, we purchased ours from Marco with San Tan Valley Coops and More.  We got the most basic coop out there, but this guy builds some serious stuff, so if you are in the market and in the Phoenix area, check him out.
And since we were in a farm-y mood when the chickens arrived, we decided to make some fresh bread and butter for snack the next morning in our preschool class.  Just in case you are feeling farm-y, here are some recipes for you:

Bread

2 1/4 - 2 1/2 c. flour - I do a mix of bread flour and whole wheat
1 c. warm water
1 1/2 t. yeast
2 T softened butter
Handful of rolled oats
2 T honey - or more if you like
1 1/2 t. salt

Ok, so I cheat and put this in my bread machine, according to the directions for dough, pull it out and let the kiddos make it into rolls or any shape they like.  We cover and let it rest for 15min. and then bake at 375 for 12-15 min. or until golden.  BUT, if you want to do it the old fashioned way, you would:

Mix water and honey, top with yeast, let foam
Add oats, butter, flour and salt, mix
Turn out and knead for 10min.
Leave to rise covered in oiled bowl for 1 1/2 - 2 hrs.
Form into rolls/shapes
Cover and let rest 15 min.
Bake 375 for 12-15min.

And you can't have bread without:
Butter!

Whipping cream
Salt


Baby food jars are perfect for little hands, but I'm sure any jar would work.  Place a few tablespoons of cream into the jar (or no more than 1/2 full if using a larger jar) and add a pinch of salt.  Shake, shake, shake!  Oh, and when you are shaking, you should probably look like this.

If you don't, I'm not sure it'll turn out right.  Kidding, of course!  But, seriously, how funny is he??

Anyway, once your butter has formed, you'll have some buttermilk left in the jar, so swish some cold water around in the jar until that excess washes away and the water runs clear.  I've made butter like this many times in the past, but I've never rinsed with water before, I learned about that part from the curriculum guide I purchased from Little Acorn Learning and let me tell you, it made a world of difference - I'll continue making butter this way every time!

Well, if you've been following along, you should have some warm bread and some delicious, creamy butter ready to devour right about now, so go ahead and enjoy!


Wednesday, April 3, 2013

An Eggs-traordinary Eggs-travaganza


Ok, so I took some liberties with the title, but this week of egg dyeing techniques was seriously the most fun I've had in a long time.  The kiddos were all so excited (yes, I know I could have said 'egg-cited') even though Easter was over.  The holiday activities were fresh in their minds and they were more than happy to continue the festivities at preschool.

Because of the way our preschool schedule works, I have different children every day, but a few who come multiple days, and I knew one egg dyeing technique just wouldn't work, so I thought, why not do a different one each day?  Since I have two classes each day, that's quite a few different ways to color an egg!

**********************************************************
Our first adventure was 'Tie Dye Eggs' courtesy of Mom to 2 Posh Lil Divas.  You can find handy instructions on her blog, so I'll just show off our stellar pictures.

Drippity-drop, drippity-drop, make the colors plippity-plop!
 
Squeezing tubes of food coloring is a bit difficult for little hands!
I got the spray bottles at the Dollar Tree - they are the perfect size and only have a 'mist' function, so it's difficult for the little ones to get too carried away when all they want to do is spray, spray, spray! 
We waited patiently until the end of class for our results, but they were worth the wait!!
Awesome!!!  By far our best results!

***********************************************************
Our next technique was natural food dye.  There are a TON of recipes and suggestions online, but I'll just go ahead and link you up with my favorite local blog, Fit Kid's Clubhouse. 
Based on numerous suggestions, I decided to try the most mentioned items, cabbage, beets, blueberries, coffee, and turmeric.  I also had some curry powder and thought I'd throw that in for good measure.  The most common item I heard mentioned to get a green egg was liquid chlorophyll, but who the heck has that laying around?  I thought I'd try some chlorella powder - cause, ya know, EVERYONE has THAT laying around! :)
There were many sights and smells with this technique, the worst of which was the lovely algae aroma of the chlorella powder.....needless to say the kiddos left the kitchen and headed outside as we boiled everything and awaited results. 
Prior to placing the eggs in the pots, I wrote on them with a white crayon the name of each natural dye we were trying - as you can see, only the coffee egg really held the crayon.  There is faint lettering on the turmeric egg as well, but I'll just have to rely on my memory.  From the top left: chlorella - pretty much no color; coffee - light brown; beets - pinkish/grey; blueberries - blue-grey; turmeric - yellow; curry powder - light yellow; cabbage - light blue; and the last one was a mix of the red cabbage and the turmeric that I threw together at the last minute after seeing it on the Fit Kid's Clubhouse blog - ya know, just in case the chlorella didn't take.

Overall, this was a good experiment for the kids, we got to use our senses and we learned never to boil chlorella powder again!

*****************************************************
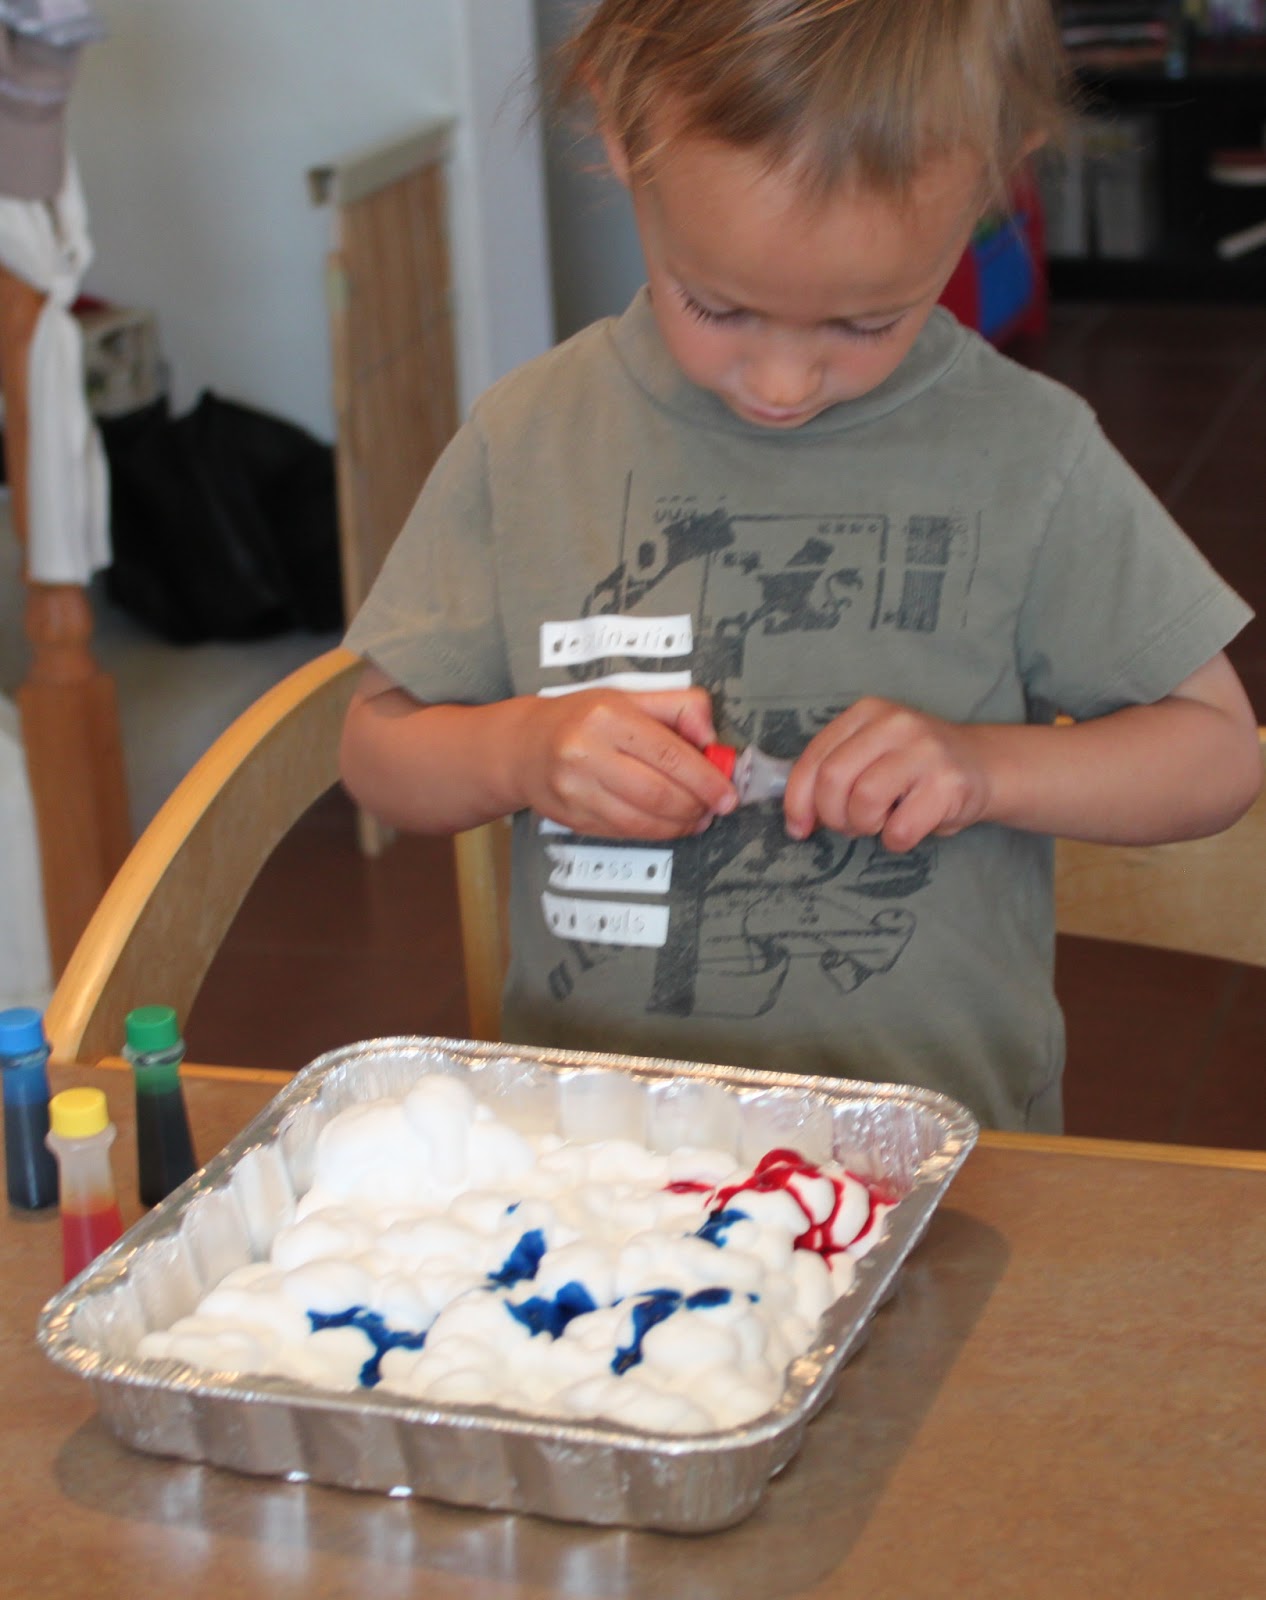
My favorite this week had to be our Shaving Cream Eggs (real and paper).  Done beautifully here.  I've done shaving cream art in the past and it's always a favorite, but after reading about mixed results on the eggs, I was determined to get a beautiful finished product.
I made sure to use just enough shaving cream to cover the bottom of the tray and encouraged the kiddos to use as much color as they wanted, then some swirling and roll the eggs in the cream.  I let them sit for a few minutes before wiping the shaving cream off with a paper towel.
I'm very happy with the way they turned out and the kiddos got to take home the paper versions.

*****************************************************
 Next up: A technique using hot glue as a stencil that I found at Measured by the Heart.  I know most preschool teachers wouldn't allow the use of hot glue guns by the students, but this particular class is made up of all older children and I knew they would use caution.  I loved this technique in theory, but I had some difficulty with it.  I'm not sure if it was the hot glue itself, or the fact that I decided to take a short cut and use the 'hard cooked eggs in the oven' method for this particular dozen eggs, but something went wrong.  As we peeled the glue from the eggs, the shell came with it; thus, not revealing the lovely stenciling featured on the blog.
However, I'm pretty sure that because I took this very cleverly composed shot of our materials, all is forgiven. :)
 We used whisks to make dipping easier after we applied the hot glue and the kiddos had a blast just dipping and dipping and dipping, until we ended up with quite a few brown eggs....they didn't care about the glue portion at all, really.
 Well, putting the glue on was fun, but beyond that, it was all about the dipping!
 I still think the results were lovely!

****************************************************
Last, but definitely not least, our most EGG-splosive (yes, I went there) technique - Volcano Egg Dyeing!!!  We did this one last year and it was a huge hit, so I decided to use it for the final two classes.  
I made a very thick paste with baking soda, food coloring and water for the children to paint on their eggs.  Once they were finished painting, I gave them the 'secret ingredient' - vinegar!!
Once they discovered what happened when the vinegar was poured on the egg, they couldn't get enough!  They painted and poured and there was no stopping them - it was a great way to finish off our egg dyeing adventures!


I know this was a long one, thanks for sticking with it!!  Now, off to plan for next Easter!


Monday, April 1, 2013

Marvelous Mystifying Magnets!


The magnet set is something that only makes an appearance every so often when things need to be shaken up a bit.  Last week, after the rainbow and shamrock fever died down a bit, I needed something to fill the gap until our April activities were unveiled.  Our block table was revamped to look like this. 
On the first day of this new set up, only the oldest children could effectively manipulate the magnets - some of which are extremely powerful and can snap together from inches away.
 
One of my two year olds discovered that the best way around a potential finger injury from snapping magnets was to use a wand.  When she lifted it off the table, she was ecstatic, "I caught something!"
"Miss Lindsey, take a picture of this, this is so cooooool!"
 Yes, folks, you can indeed build with spheres.
And then, like some miracle, after three days of magnet play......this.  Order from chaos, a new understanding of how the magnets work.  All through play, with absolutely no intervention from me, except for resetting the table after each class.
And finally, the discovery that magnets not only attract, but repel also!!  This kiddo is using one rectangle to 'push' the other across the table. 
And a lot of fun making the balls 'magically' move by using a wand under the table.
These examples are just a small part of the creativity I saw all week.  My favorite were the little people one of my students made out of the balls, complete with "Daddy's big belly"......we just won't tell Daddy about that one! 


Related Posts Plugin for WordPress, Blogger...