
Ok, so I took some liberties with the title, but this week of egg dyeing techniques was seriously the most fun I've had in a long time. The kiddos were all so excited (yes, I know I could have said 'egg-cited') even though Easter was over. The holiday activities were fresh in their minds and they were more than happy to continue the festivities at preschool.
Because of the way our preschool schedule works, I have different children every day, but a few who come multiple days, and I knew one egg dyeing technique just wouldn't work, so I thought, why not do a different one each day? Since I have two classes each day, that's quite a few different ways to color an egg!
**********************************************************
Our first adventure was 'Tie Dye Eggs' courtesy of Mom to 2 Posh Lil Divas. You can find handy instructions on her blog, so I'll just show off our stellar pictures.
Drippity-drop, drippity-drop, make the colors plippity-plop!

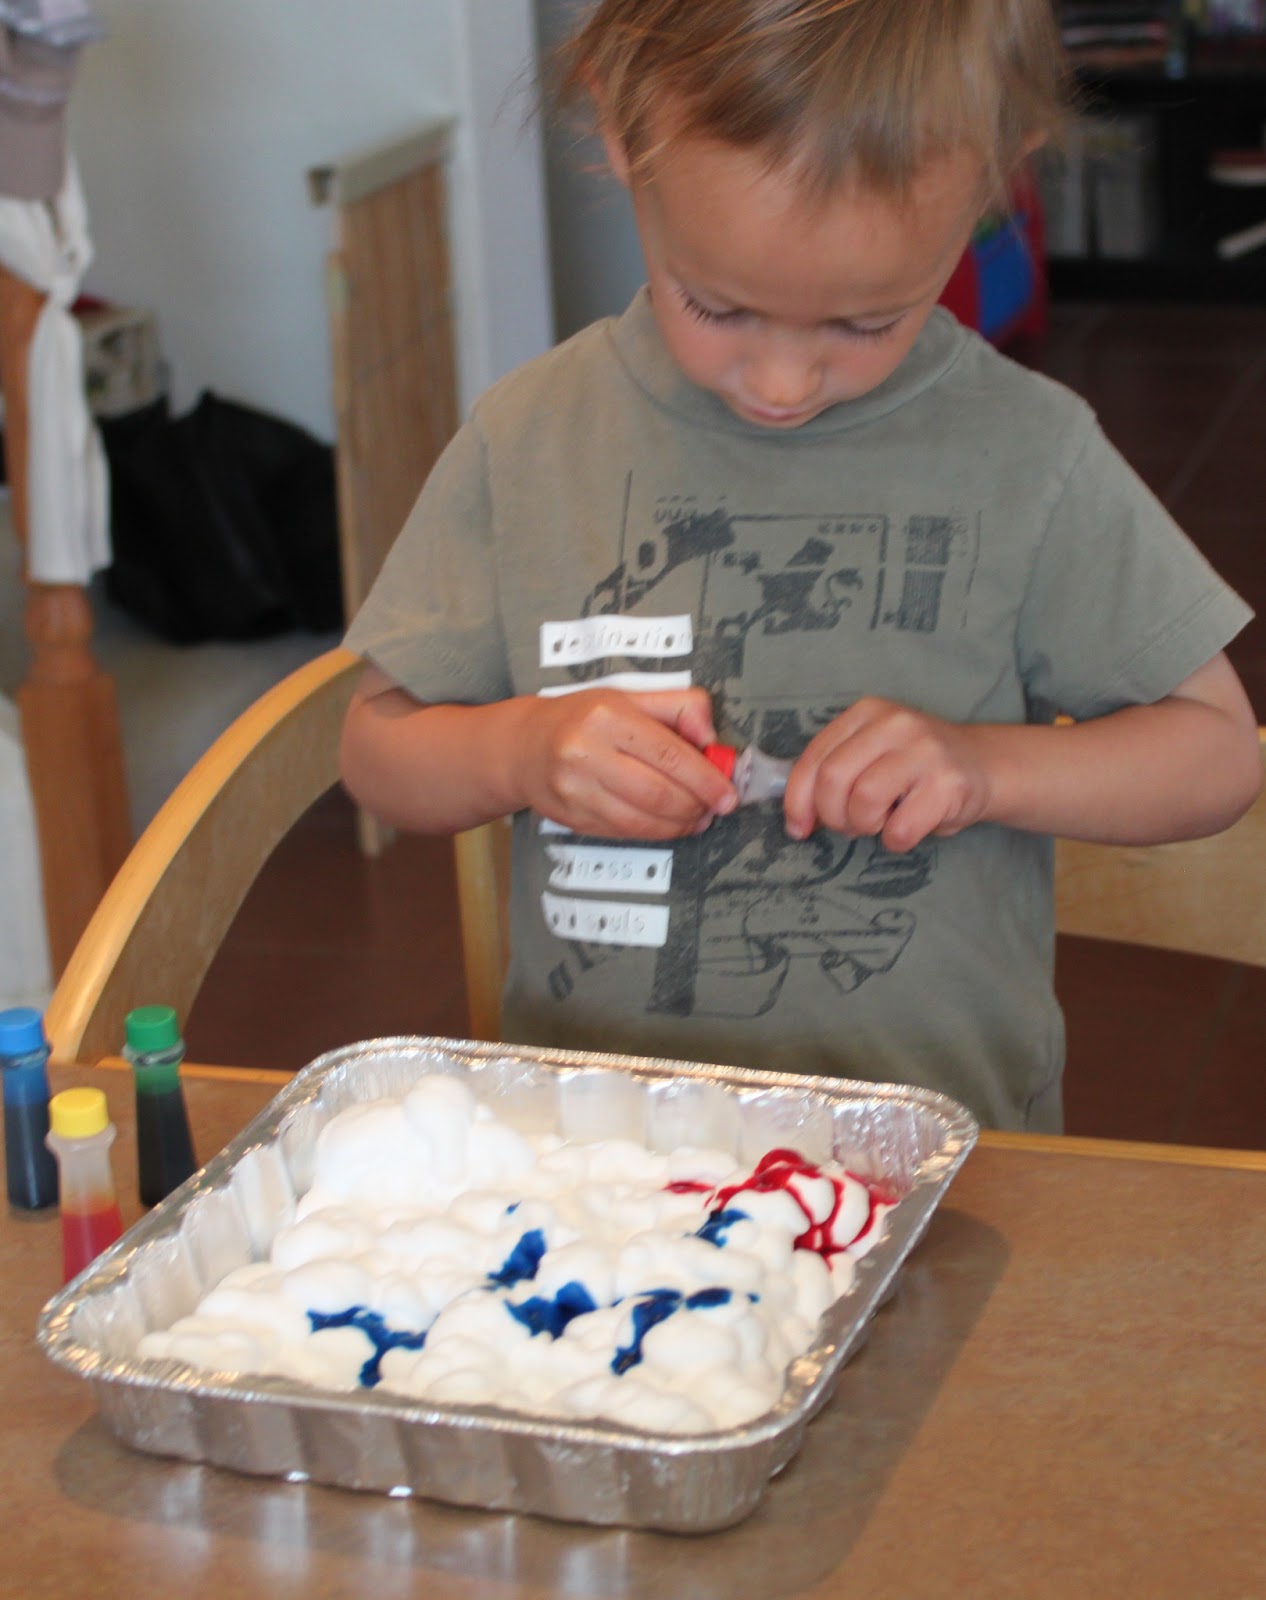
Squeezing tubes of food coloring is a bit difficult for little hands!

I got the spray bottles at the Dollar Tree - they are the perfect size and only have a 'mist' function, so it's difficult for the little ones to get too carried away when all they want to do is spray, spray, spray!

We waited patiently until the end of class for our results, but they were worth the wait!!

Awesome!!! By far our best results!

***********************************************************
Our next technique was natural food dye. There are a TON of recipes and suggestions online, but I'll just go ahead and link you up with my favorite local blog, Fit Kid's Clubhouse.

Based on numerous suggestions, I decided to try the most mentioned items, cabbage, beets, blueberries, coffee, and turmeric. I also had some curry powder and thought I'd throw that in for good measure. The most common item I heard mentioned to get a green egg was liquid chlorophyll, but who the heck has that laying around? I thought I'd try some chlorella powder - cause, ya know, EVERYONE has THAT laying around! :)


There were many sights and smells with this technique, the worst of which was the lovely algae aroma of the chlorella powder.....needless to say the kiddos left the kitchen and headed outside as we boiled everything and awaited results.

Prior to placing the eggs in the pots, I wrote on them with a white crayon the name of each natural dye we were trying - as you can see, only the coffee egg really held the crayon. There is faint lettering on the turmeric egg as well, but I'll just have to rely on my memory. From the top left: chlorella - pretty much no color; coffee - light brown; beets - pinkish/grey; blueberries - blue-grey; turmeric - yellow; curry powder - light yellow; cabbage - light blue; and the last one was a mix of the red cabbage and the turmeric that I threw together at the last minute after seeing it on the Fit Kid's Clubhouse blog - ya know, just in case the chlorella didn't take.
Overall, this was a good experiment for the kids, we got to use our senses and we learned never to boil chlorella powder again!
*****************************************************
My favorite this week had to be our Shaving Cream Eggs (real and paper). Done beautifully here. I've done shaving cream art in the past and it's always a favorite, but after reading about mixed results on the eggs, I was determined to get a beautiful finished product.


I made sure to use just enough shaving cream to cover the bottom of the tray and encouraged the kiddos to use as much color as they wanted, then some swirling and roll the eggs in the cream. I let them sit for a few minutes before wiping the shaving cream off with a paper towel.

I'm very happy with the way they turned out and the kiddos got to take home the paper versions.

*****************************************************
Next up: A technique using hot glue as a stencil that I found at Measured by the Heart. I know most preschool teachers wouldn't allow the use of hot glue guns by the students, but this particular class is made up of all older children and I knew they would use caution. I loved this technique in theory, but I had some difficulty with it. I'm not sure if it was the hot glue itself, or the fact that I decided to take a short cut and use the 'hard cooked eggs in the oven' method for this particular dozen eggs, but something went wrong. As we peeled the glue from the eggs, the shell came with it; thus, not revealing the lovely stenciling featured on the blog.

However, I'm pretty sure that because I took this very cleverly composed shot of our materials, all is forgiven. :)

We used whisks to make dipping easier after we applied the hot glue and the kiddos had a blast just dipping and dipping and dipping, until we ended up with quite a few brown eggs....they didn't care about the glue portion at all, really.

Well, putting the glue on was fun, but beyond that, it was all about the dipping!

I still think the results were lovely!
****************************************************
Last, but definitely not least, our most EGG-splosive (yes, I went there) technique - Volcano Egg Dyeing!!! We did this one last year and it was a huge hit, so I decided to use it for the final two classes.


I made a very thick paste with baking soda, food coloring and water for the children to paint on their eggs. Once they were finished painting, I gave them the 'secret ingredient' - vinegar!!

Once they discovered what happened when the vinegar was poured on the egg, they couldn't get enough! They painted and poured and there was no stopping them - it was a great way to finish off our egg dyeing adventures!

I know this was a long one, thanks for sticking with it!! Now, off to plan for next Easter!
Looks like you made lots of really pretty eggs! Found your blog through the Imagination Tree's FB page for Share Sunday.
ReplyDeleteThanks for visiting! I'll be sure to check out your blog as well - it seems we're both newcomers to the blog world!
ReplyDelete